Oracle KeyVault Multimaster setup steps
First node IP : 192.168.194.122 | voracle8x-oracle-key-vault2
Second node IP : 192.168.194.123 | voracle8x-oracle-key-vault3
Note: the DNS and NTP are manadtory for the multimaster setup. Since I didnt have both available; I didnt try making /etc/hosts in first attempt to honour oracle's requirement not to tamper any setting in the server and use only web UI or restapi or okvutil to do tasks with the machine.
Prereq: Atleast make a NTP server entry in system tab (even if the NTP server isnt reachable from the OKV node 1)
Controller node creation:
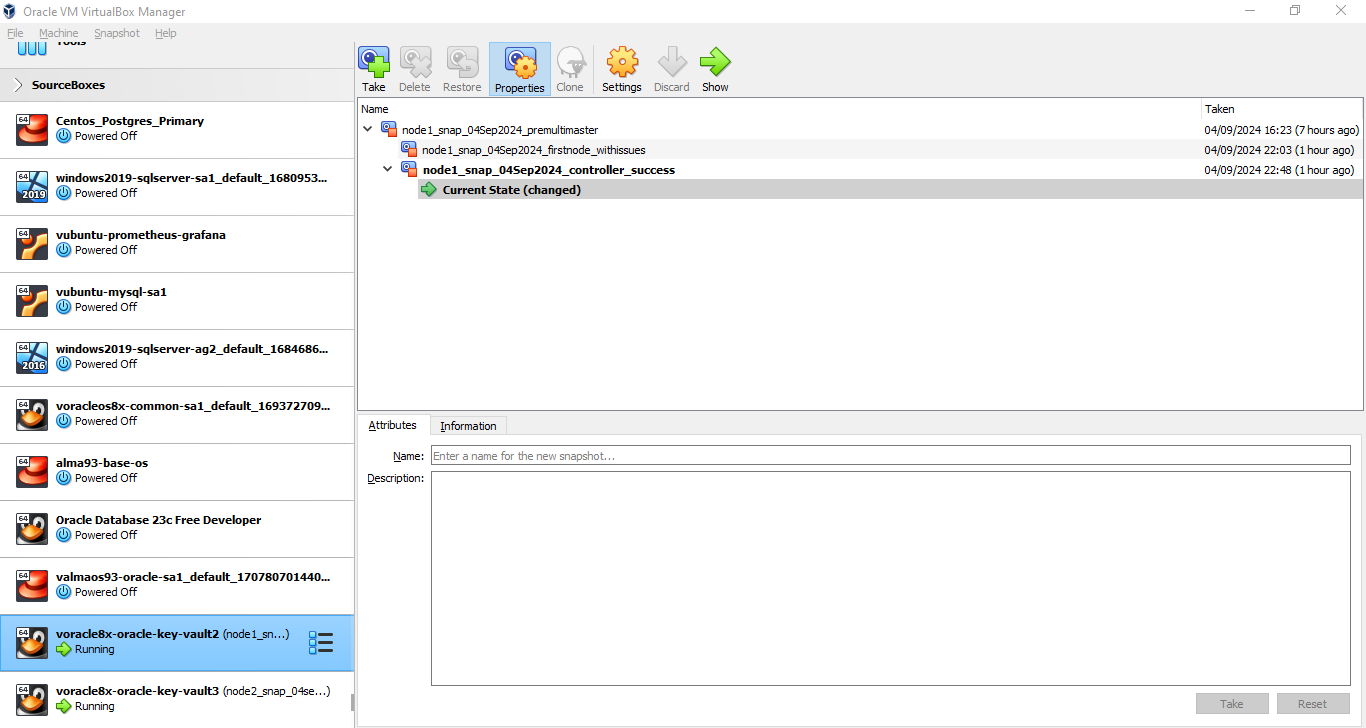
1. Backup the existing nodes
Use backup & restore from the web UI.
workaround: I used the virtual box vm snapshot instead in vm shut state.
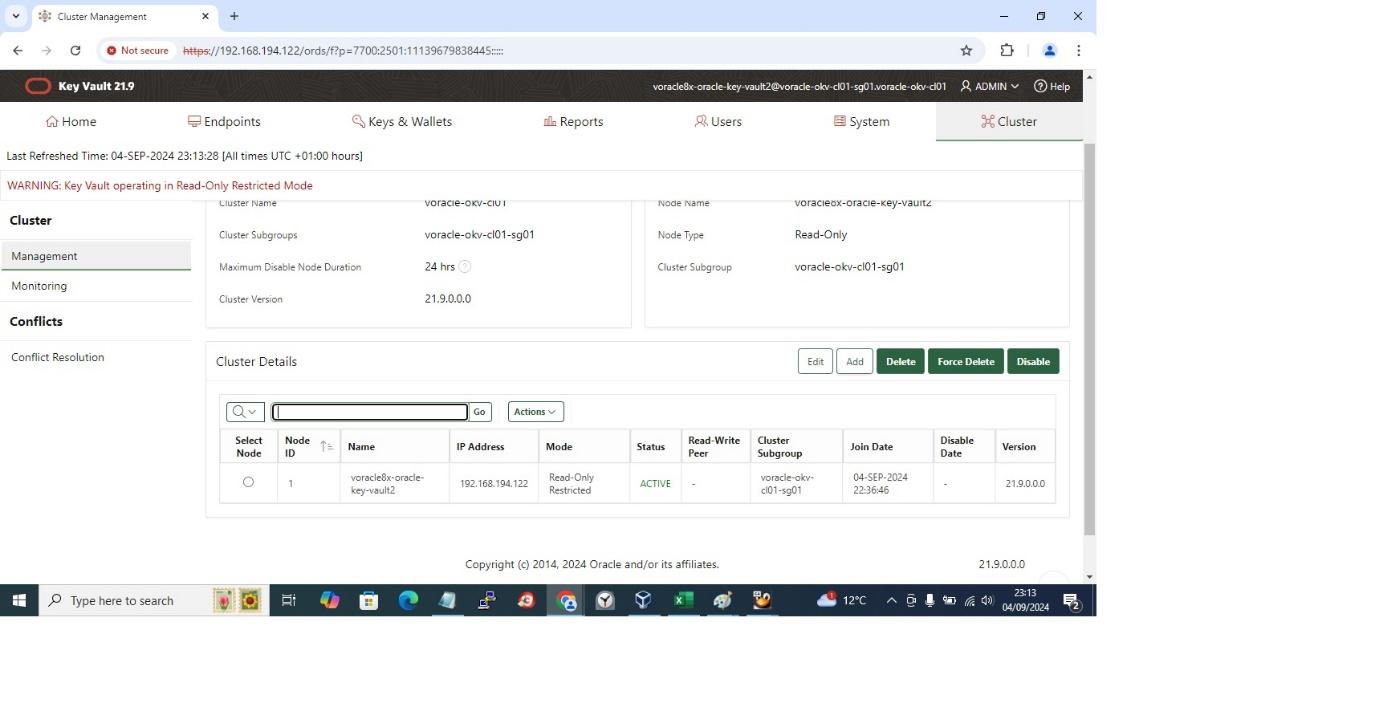
2. Once remote backup finishes; go to cluster tab
3. Verify server IP
4. Select "YES" for First node of cluster option
5. Enter node name, this cant be changed later
6. Enter cluster name
7. Enter cluster subgroup name
8. Convert the node to candidate node (eventually this is the first node or controller node in the cluster).
In our case:
Clustername: voracle-okv-cl01
cluster subgroup name: voracle-okv-cl01-sg01
Issues: The OKV cluster doesnt allow the conversion without NTP server; to mitigate it we tried fixing the port forward for internet. No help, the NTP server is still not reachable.
Finally we entered the public NTP server 0.uk.pool.ntp.org; the OkV server failed to reach the ntp server.
But still the conversion worked.
Induction completed until here:
First node IP : 192.168.194.122 | voracle8x-oracle-key-vault2
Pending:
Second node IP : 192.168.194.123 | voracle8x-oracle-key-vault3
Candidate node addition (2nd node in read write pair):
Prereqs: Backup the existing controller or first node.
Candidate node addition steps:
Backup steps:
1. shutdown the controller node
2. Take a snapshot of the controller node from virtual box
3. So the backups are
A. Backup as of node1_snap_04Sep2024_controller_success & node2_snap_04sep2024_postconfig_premultimaster

1. Login to web UI console as system admin user
http://192.168.194.122 [controller node]
2. Goto system tab
3. click on backup & restore ---- -> backup is already secured
4. Ensure a remote backup is secured---- -> backup is already secured
5. Firewall ports are opened as mentioned in OKV guide (in local lan, it shouldnt be concern) ---> same VLAN and no firewall between
6. Goto cluster tab
7. Click on management tab from left navigation bar
8. Click add under cluster details
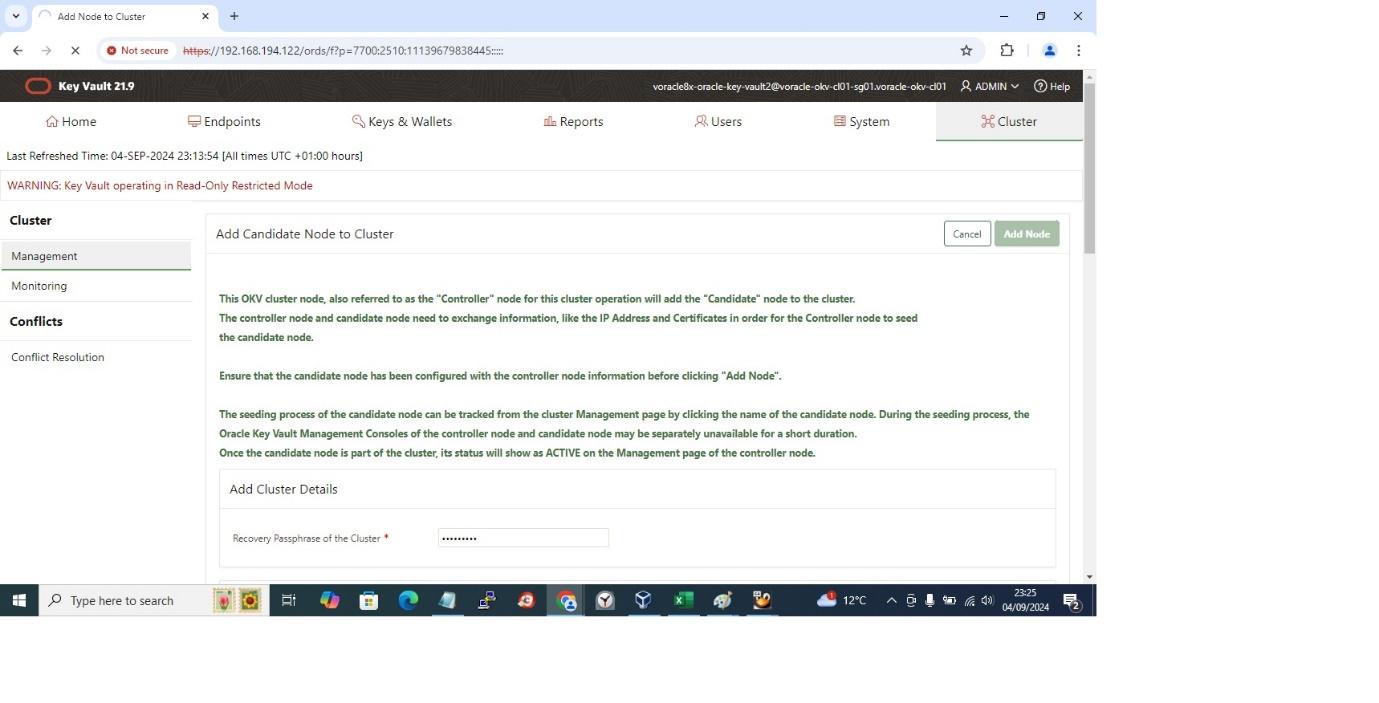
9. Add cluster node details to the "add candidate node section"
10. enter the recovery passphrase of controller node
11. Add candidate node section details:
a. Add as read/write pair : yes
b. Node id: unique id auto populated (leave it as is)
c. Node name: enter unique name for the candidate node; again auto populated with server name
d. cluster subgroup: keep the original here, since the DC is same and the servers are build only for HA not DR
e. cluster name: auto populated
f. IP address
g. Certificate of the candidate node:
i. open a new browser window with system admin credential; login to
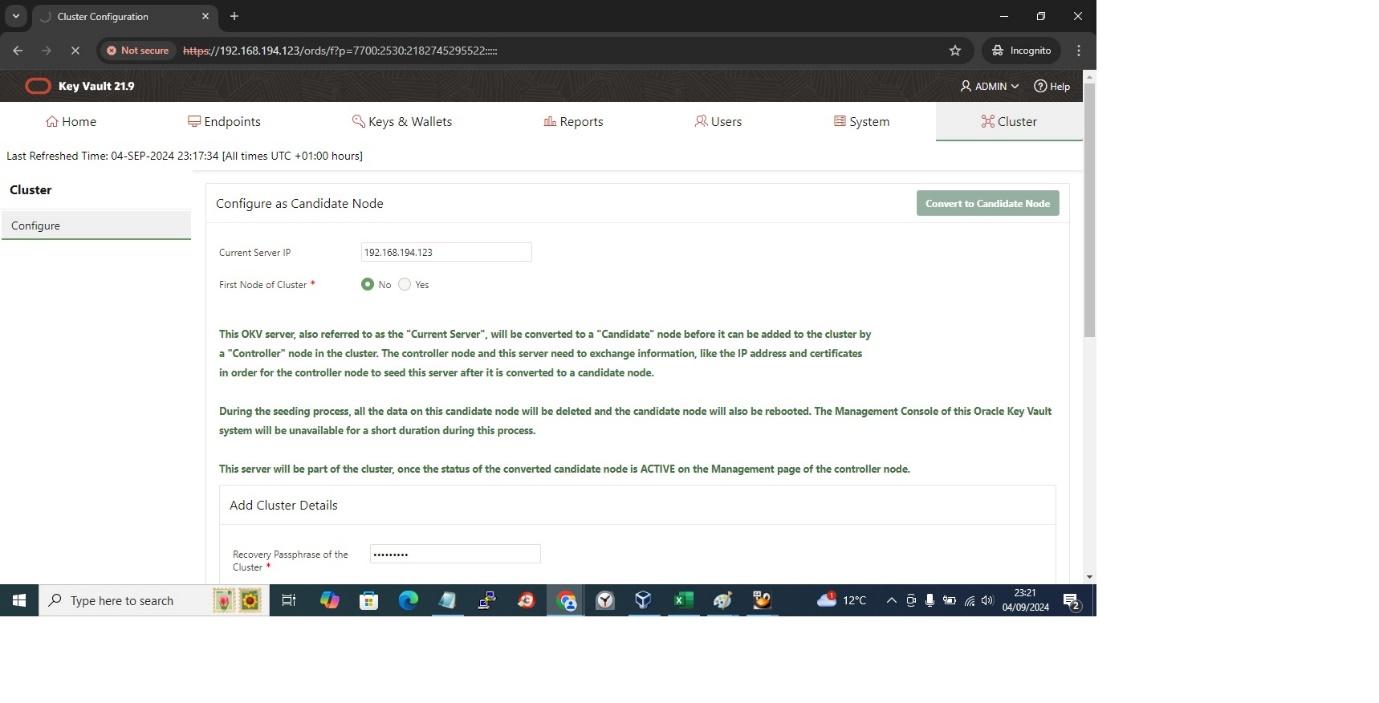
https://192.168.194.123 [candidate node]
ii. First node of the cluster: No
iii. Enter recovery passphrase from controller node
iv. IP of the controller node
v. certificate of the controller node: on bottom of the original screen open already - you should see the certificate available, just copy the certificate content
vi. come back to the candidate browser node: paste the certificate from controller node
vii. now after validation of recovery passphrase and certificate, click convert to candidate node
viii. once conversion is complete, a new certificate appears on this page
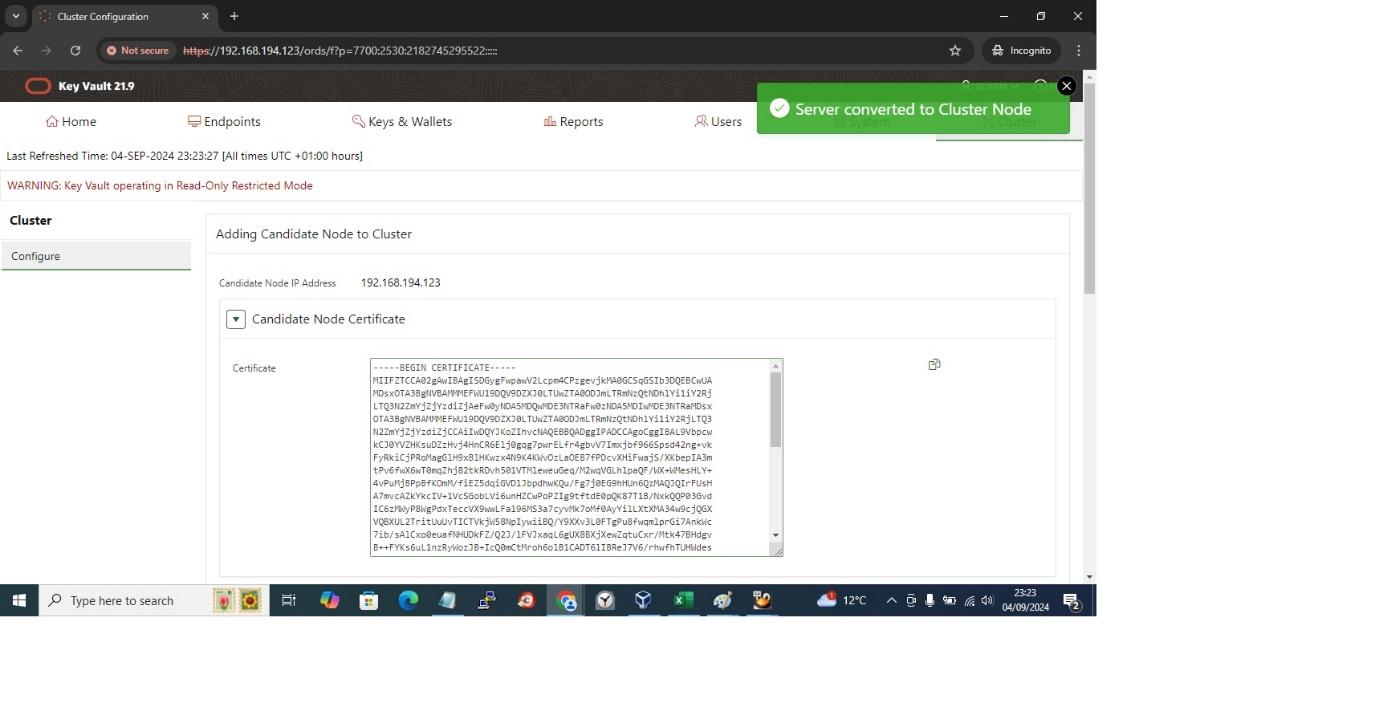
h. copy this certificate to controller node browser now, paste under candidate node certificate section
i. Click add node
Progress track:
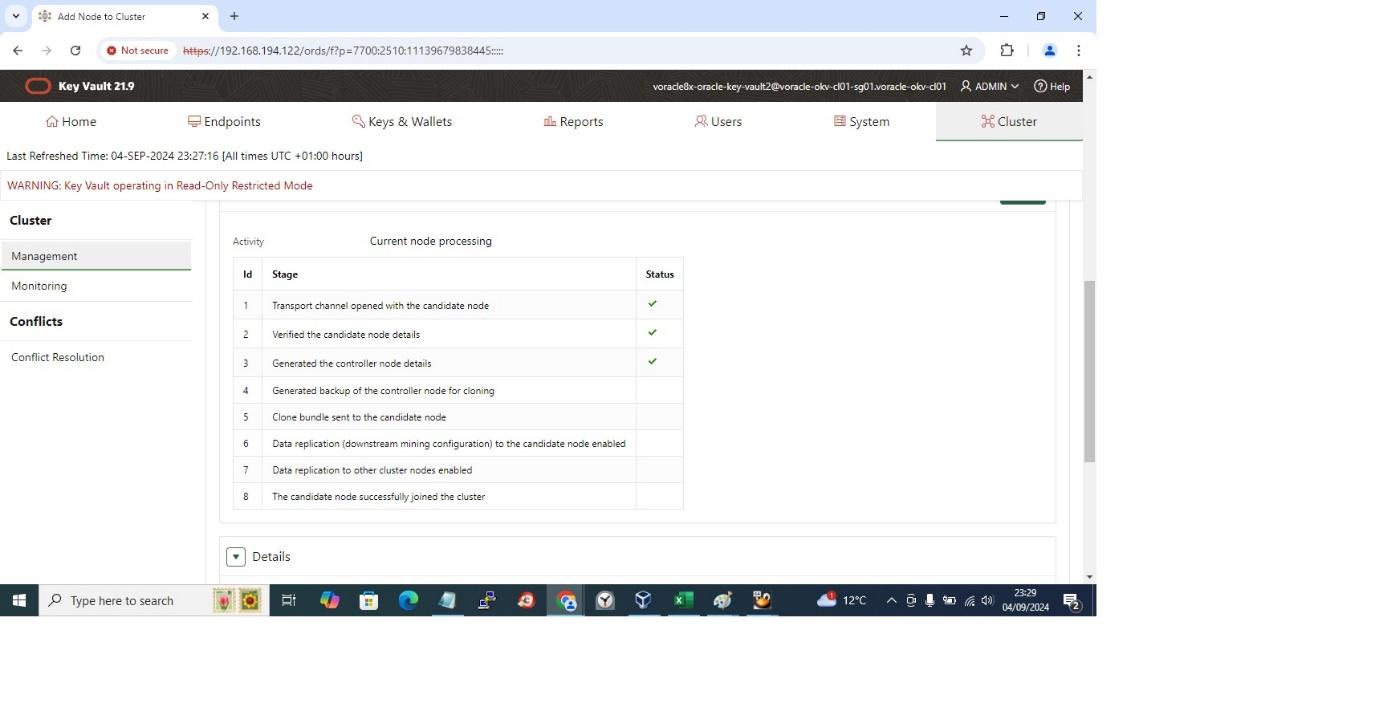
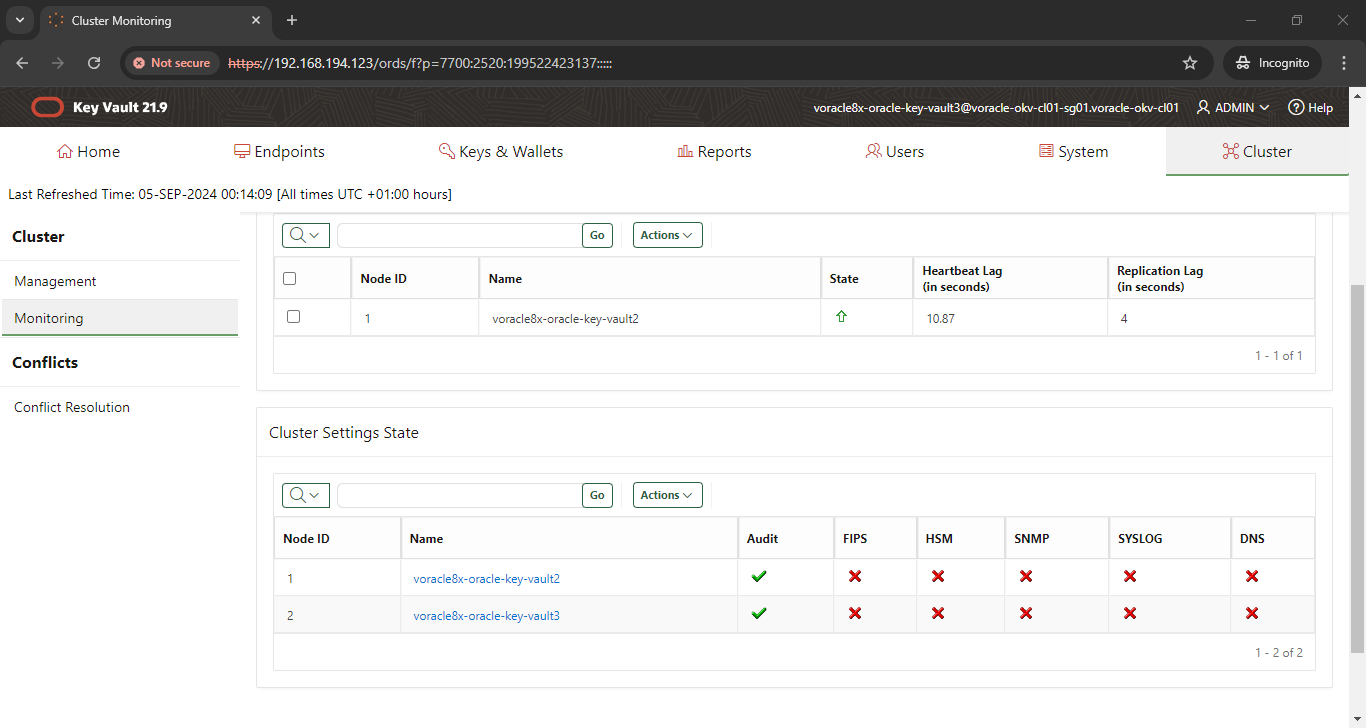
>>> it will take sometime (upto an hour or more based on volume of data to sync) to finish
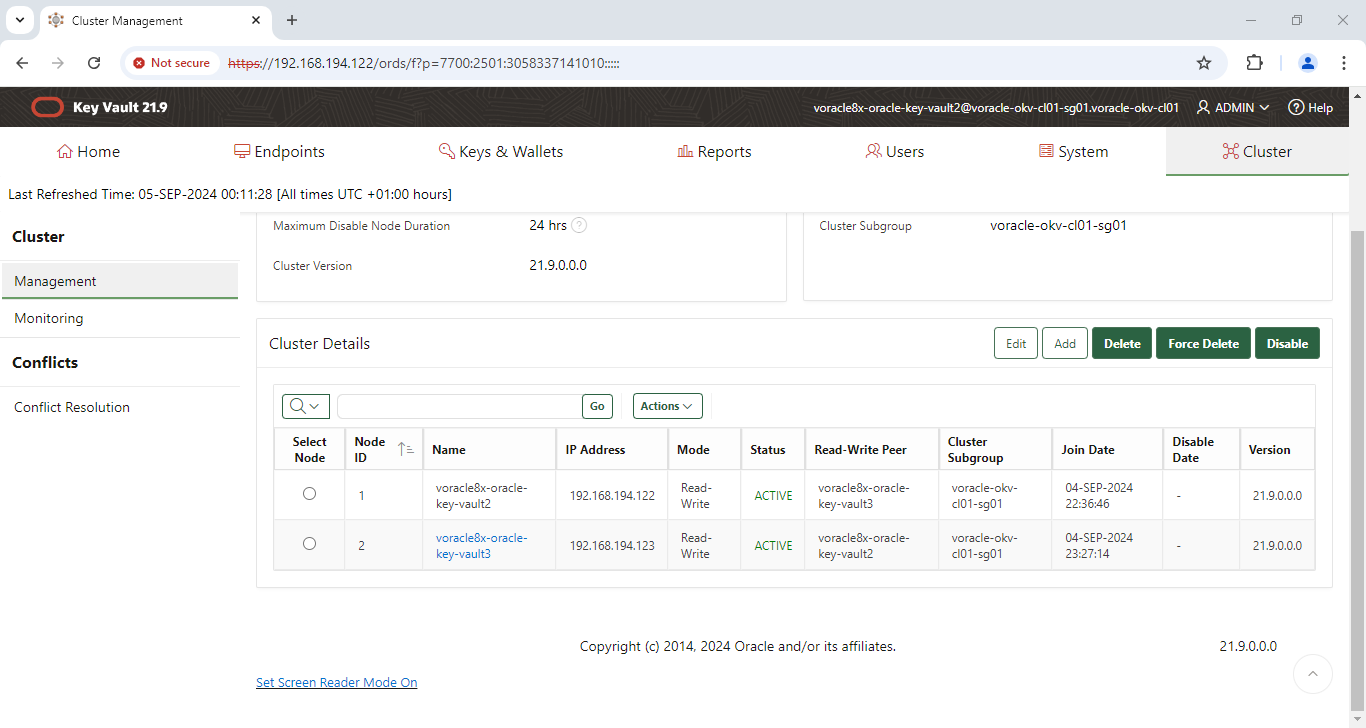
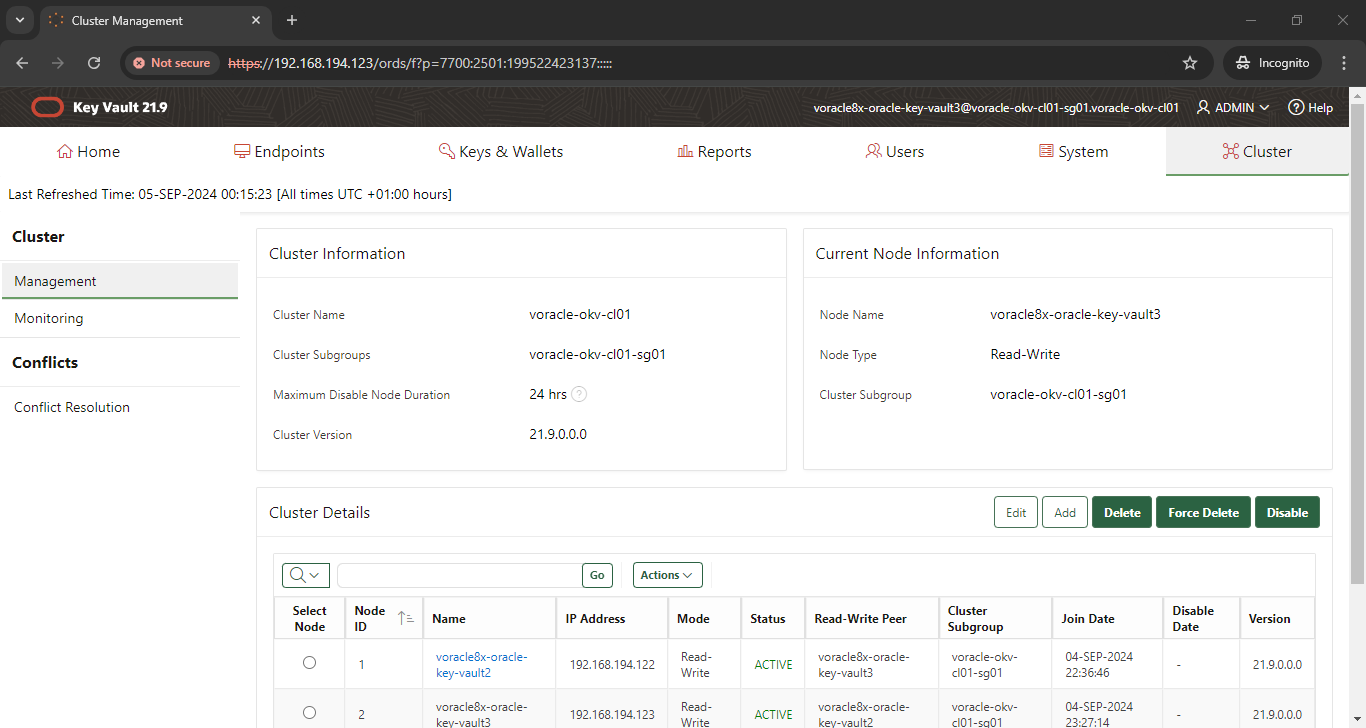
>>>once it finishes, all the nodes will be displayed as active nodes
From other node:
>> secure an offline vm snap at this stage.
node1: node1_snap_04Sep2024_post_multimaster_setup
node2: node2_snap_04Sep2024_post_multimaster_setup
YouTube video:
Thanks


No comments:
Post a Comment