In this blog we will walk through the steps involved in Oracle Golden Gate 21.3 replication setup.
Browser based action:

As per oracle instruction, we take look at the admin service port


Click on the url opens admin console.

Overview page looks like below...

Click three dash [application navigation] and go to configuration

Add new credential

Enter the user id in the form of EZConnect. I have created the credential for CDB connection, Source PDB and target standalone setup.


The ggadmin credentials needs to be tested as shown below. All the connection credentials to be tested; to be sure it works. Then remove the lock

Like below

Add TRANDATA (source)
,CHECKPOINT (target) & HeartBeat by following
the below screenshots:
Connect to source PDB by clicking on the action button corresponding to the ggadmin_opdb1 connection alias:
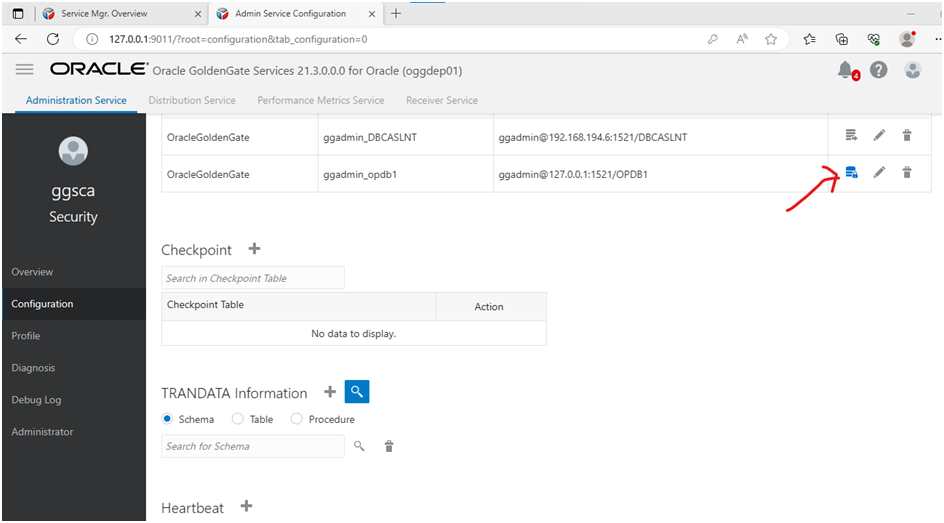
Search for the schema to be used for replication (TRANDATA):
Irrespective, if your using a CDB connection prefix PDB name, if we are using PDB connection. My search with or without prefix schema search works just fine.

Add checkpoint table (target):


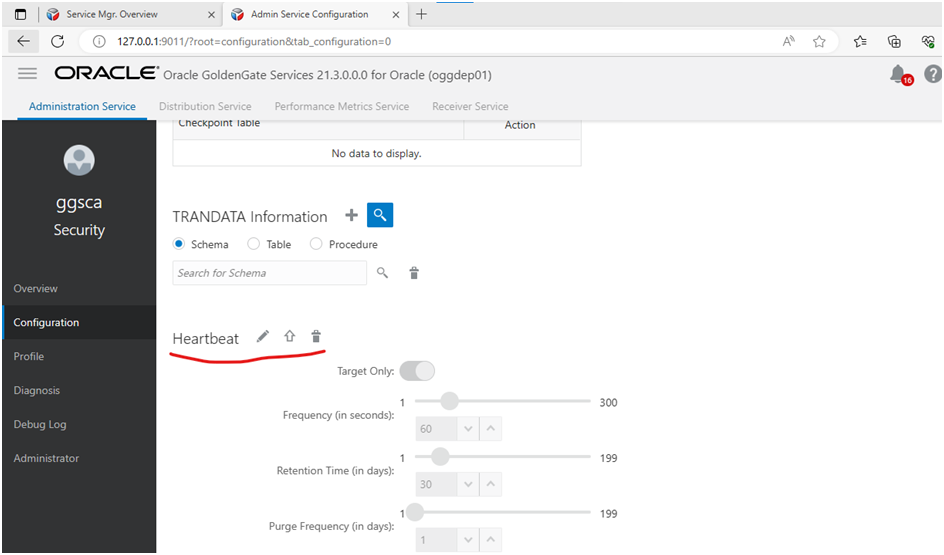
Add HeartBeat tables to both source and target (connect to source and target one by one add them):
Like below..

After HeartBeat is added, the icons will be greyed out:
Step Extract:
Go back to overview section in Admin UI

Click on add symbol near EXTRACT:

Leave the default selection “Integrated Extract”

Click next and fill highlighted fields. Give a name to the extract source process, location where the trail files gets stored and the username to use for extract. Remember in source if it is Container deployment, we have to use CDB connection, hence we chose cggadmin credential alias.
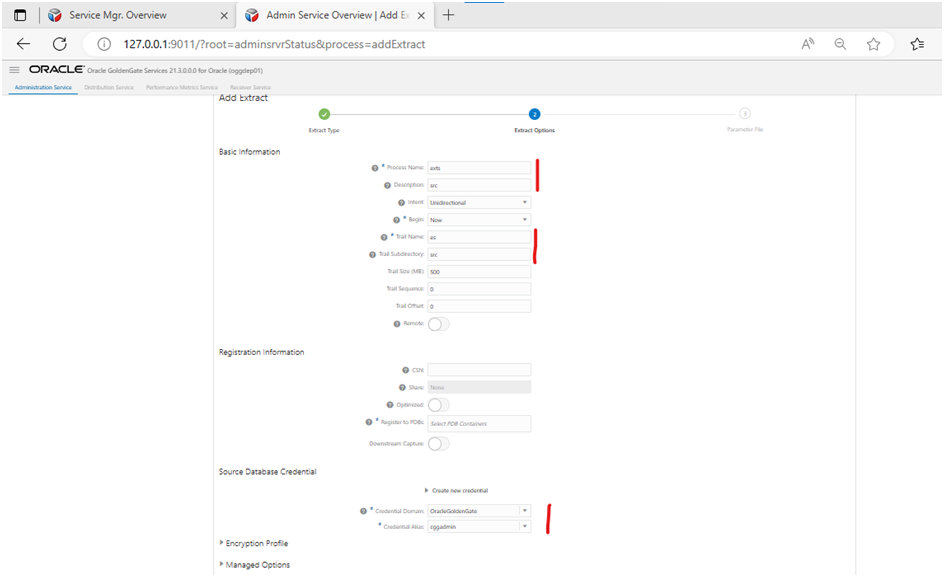
Choose PDB for replication as well.

By default you get the below on next screen:

We have to add the below settings..
SOURCECATALOG DBEAST
DDL INCLUDE MAPPED
TABLE hr.*;
SOURCECATALOG OPDB1
DDL INCLUDE MAPPED
TABLE OPDB1_PUBLIC_USER.*;

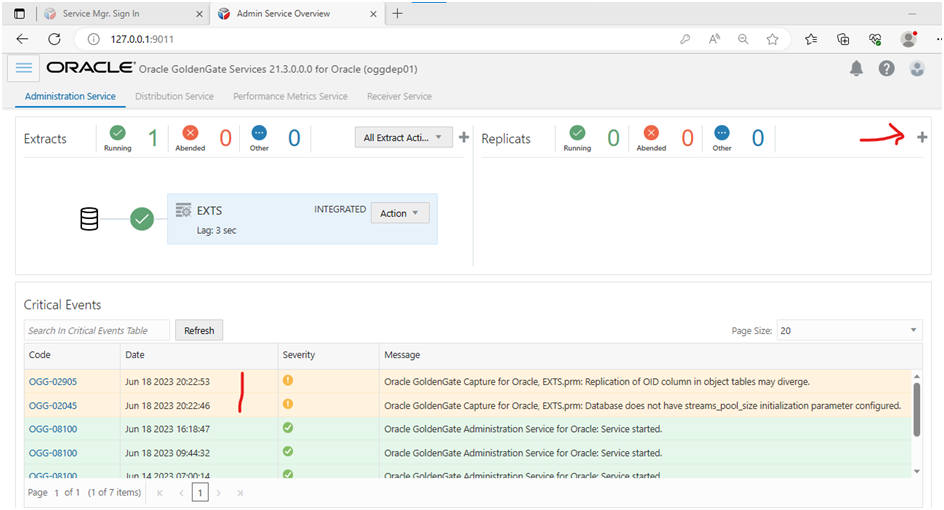
Click create and run to launch extract.

1 Extract process launched. We can see extract trail files as well.
[oracle@vcentos79-oracle-sa1
src]$ ls -altr
total 4
drwxr-x---.
3 oracle oinstall 17 Jun 18 20:22 ..
drwxr-x---.
2 oracle oinstall 25 Jun 18 20:22 .
-rw-r-----.
1 oracle oinstall 1329 Jun 18 20:22 es000000000
[oracle@vcentos79-oracle-sa1
src]$ pwd
/oggdata/oggdep01/var/lib/data/src
[oracle@vcentos79-oracle-sa1
src]$
Add Replicat process now:
Ensure to copy the schema to target db before (initial loading should be done)
[note: in a low memory system, you may hit UDE-31623 , in such case stop GG extract and retry datadump during initial load]
Click on +
sign to add new replicat process:
Select
parallel non-integerated replication option

The
highlighted options need to be modified..

Next
brings the below default info populated

USERIDALIAS ggwest DOMAIN OracleGoldenGate
--DDL EXCLUDE ALL
DDLERROR default discard
REPERROR (default,discard)
DDLOPTIONS REPORT
SOURCECATALOG DBEAST
MAP hr.*, TARGET hr.*;
REPLICAT rept
USERIDALIAS ggadmin_DBCASLNT DOMAIN OracleGoldenGate
--DDL EXCLUDE ALL
DDLERROR default discard
REPERROR (default,discard)
DDLOPTIONS REPORT
SOURCECATALOG OPDB1
MAP OPDB1_PUBLIC_USER.*, TARGET OPDB1_PUBLIC_USER.*;
Added
the below param and just created it and not run yet. Since my intial data copy
is still inprogress.

Param
looks like below..

Now the
inital sync is done:
Source:
18-JUN-23
20:56:57.459:
/oraarch/OPDB1_PUBLIC_USER_18Jun23_01.dmp
18-JUN-23
20:56:57.513: Job "SYS"."SYS_EXPORT_SCHEMA_01" successfully
completed at Sun Jun 18 20:56:57 2023 elapsed 0 00:03:07
Target:
18-JUN-23
21:18:17.062: W-1 Completed 11
SCHEMA_EXPORT/TABLE/TABLE_DATA objects in 785 seconds
18-JUN-23
21:18:17.266: Job "SYS"."SYS_IMPORT_SCHEMA_01" successfully
completed at Sun Jun 18 21:18:17 2023 elapsed 0 00:13:48
Now let us
kick off both extract and replicat process:

Extract
messages in source alert log:
OGG
Capture client successfully attached to GoldenGate Capture OGG$CAP_EXTS to receive
uncommitted changes with pid=60 OS id=28730.
GoldenGate
OGG$CAP_EXTS Capture sends LCRs using streaming mode (OCI call duration=60
secs, bufsize=1024000).
LOGMINER:
session#=1 (OGG$CAP_EXTS), reader H001 pid=65 OS id=28743 sid=108 started
LOGMINER: Begin
mining logfile for session 1 thread 1 sequence 76,
/oraarch/ORA19C/archivelog/2023_06_18/o1_mf_1_76_l8yr6hmj_.arc
LOGMINER:
End mining logfile for session 1 thread
1 sequence 76, /oraarch/ORA19C/archivelog/2023_06_18/o1_mf_1_76_l8yr6hmj_.arc
LOGMINER:
Begin mining logfile for session 1 thread 1 sequence 77,
/oradata/ORA19C/redo02.log

Golden Gate is complaining about streams pool not configured. But the target is very small, hence I left it as it is.
Source:
SQL> insert into "OPDB1_PUBLIC_USER"."JT1"
2 select * from "OPDB1_PUBLIC_USER"."JT1" where rownum < 2;
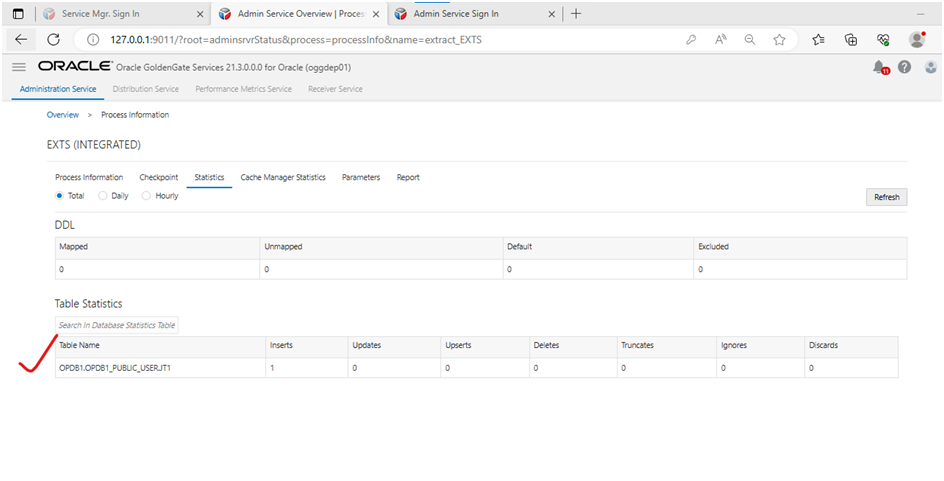
Extract
statistics:
Replication
statistics:

SQL> select count(1) from "OPDB1_PUBLIC_USER"."JT1";
----------
25000001
SQL> select count(1) from "OPDB1_PUBLIC_USER"."JT1";
----------
25000001
This
completes replication setup – a quick setup.
We saw a DML. Next we will check how a DDL is handled.


No comments:
Post a Comment