Oracle Key Vault Installation Steps in Guest VM
Reference:
https://docs.oracle.com/en/database/oracle/key-vault/21.9/okvig/installing-oracle-key-vault.html#GUID-BCCBB58F-FABD-4CAB-9427-07767D7FEB70
Please note there is no difference in the install procedure between 21.8 and 21.9, I did compare the install doc using diff utility, there is no concerning change.
Ensure prereqs are complete
OKV can be installed in either a dedicated physical hardware or a virtual machine
Secure a fixed IP address from the network team
Validate access to the iso file downloaded.
Mount the iso file into the DVD drive of the VM and boot it
Choose “Press Enter to start the installation of the Oracle Key Vault”
On prompt enter root password, remember to note it down, since you will need to set other credentials which manages the OKV at a later stage
When prompted enter root password and then press enter again to monitor the installation
Re-insert the ISO file if needed
Choose classic vs dual-nic mode, since ours is Virtual all, we will choose classic mode (1 interface)
Enter ip, subnet mask and gateway details we populated in the beginning
The install continues then to complete the installation of self-contained hardened appliance.
Once install is complete, use the terminal to login as root and set the password for support user (a user which is used for most of the BAU routines like patching, upgrade etc..)
SSH is enabled only to allow support user login.
The SSH by default should stay disabled unless upgrade patches are applied.
Post installation steps for OKV:
You may not be able to access the appliance you just finished installing using ssh. The ssh to the 192.168.194.122 might fail with below error.
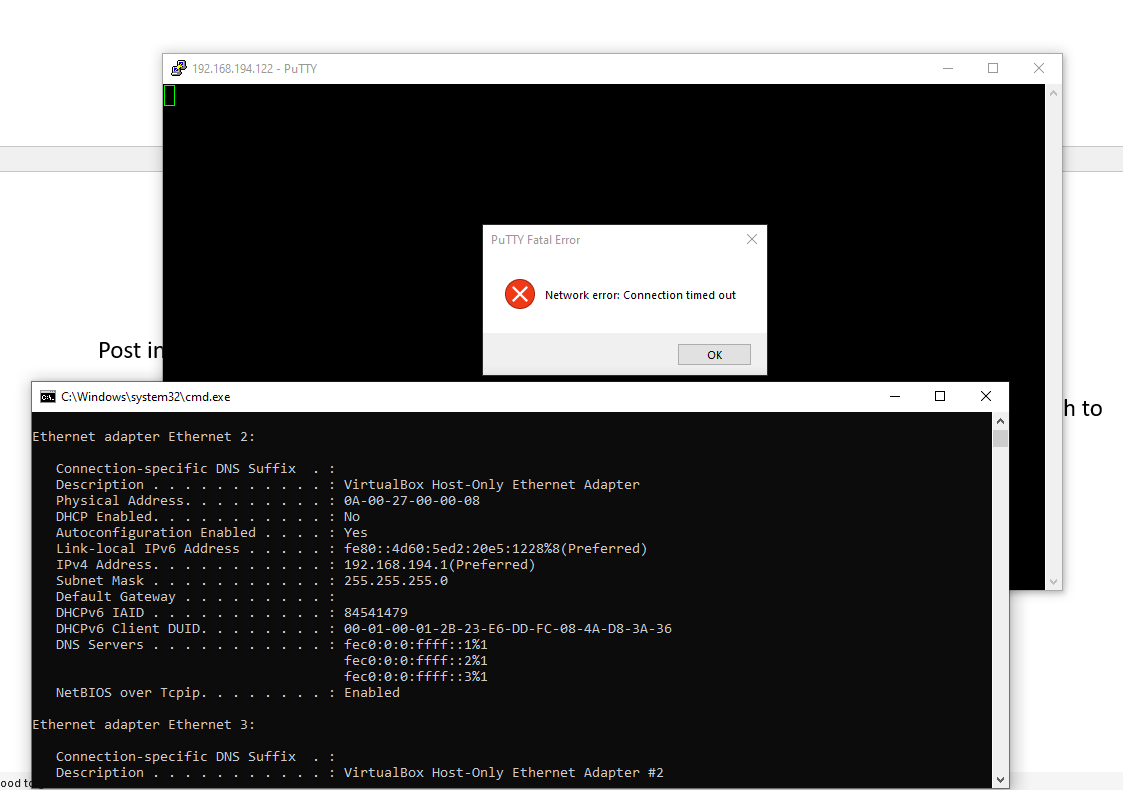
But the above error isn’t a concern. Ensure you have already set password for support user in the terminal.
The post install mainly involves setting up
Setting up administrative user accounts - one time passwords
The recovery passphrase
DNS and NTP settings
Using web browser we need to connect to the below url:
It will report its not secure, but just proceed, since the certificate isn’t installed yet. This message pops up.
Use root password, for the post install (only once) config, the OKV will directly prompt for the root password®. Login with the root password and then create
Key admin
System admin
Audit manager
If there is only OKV admin, you can keep all 3 as same user for instance “admin” for key admin and then reference the same for other 2 admin accounts as well. Grant forward option allows the users to grant their to other users on their own.
Recovery passphrase needs to be enabled, the recovery passphrase is very important when it comes to emergency situation listed below…
OKV restore
Loss or inaccessibility of one of the admin accounts
Multimaster node addition
To reset recovery passphrase
To configure a HSM
The root and support user passwords will expire after 365 days, hence we need to ensure they are changed regularly. If you end up logging in 120 days window of the password expiry, you will get a prompt and you can change the password. If not after expiry it is mandatory to change the password before login.
Next step involves DNS and NTP config.
Alert configuration


No comments:
Post a Comment